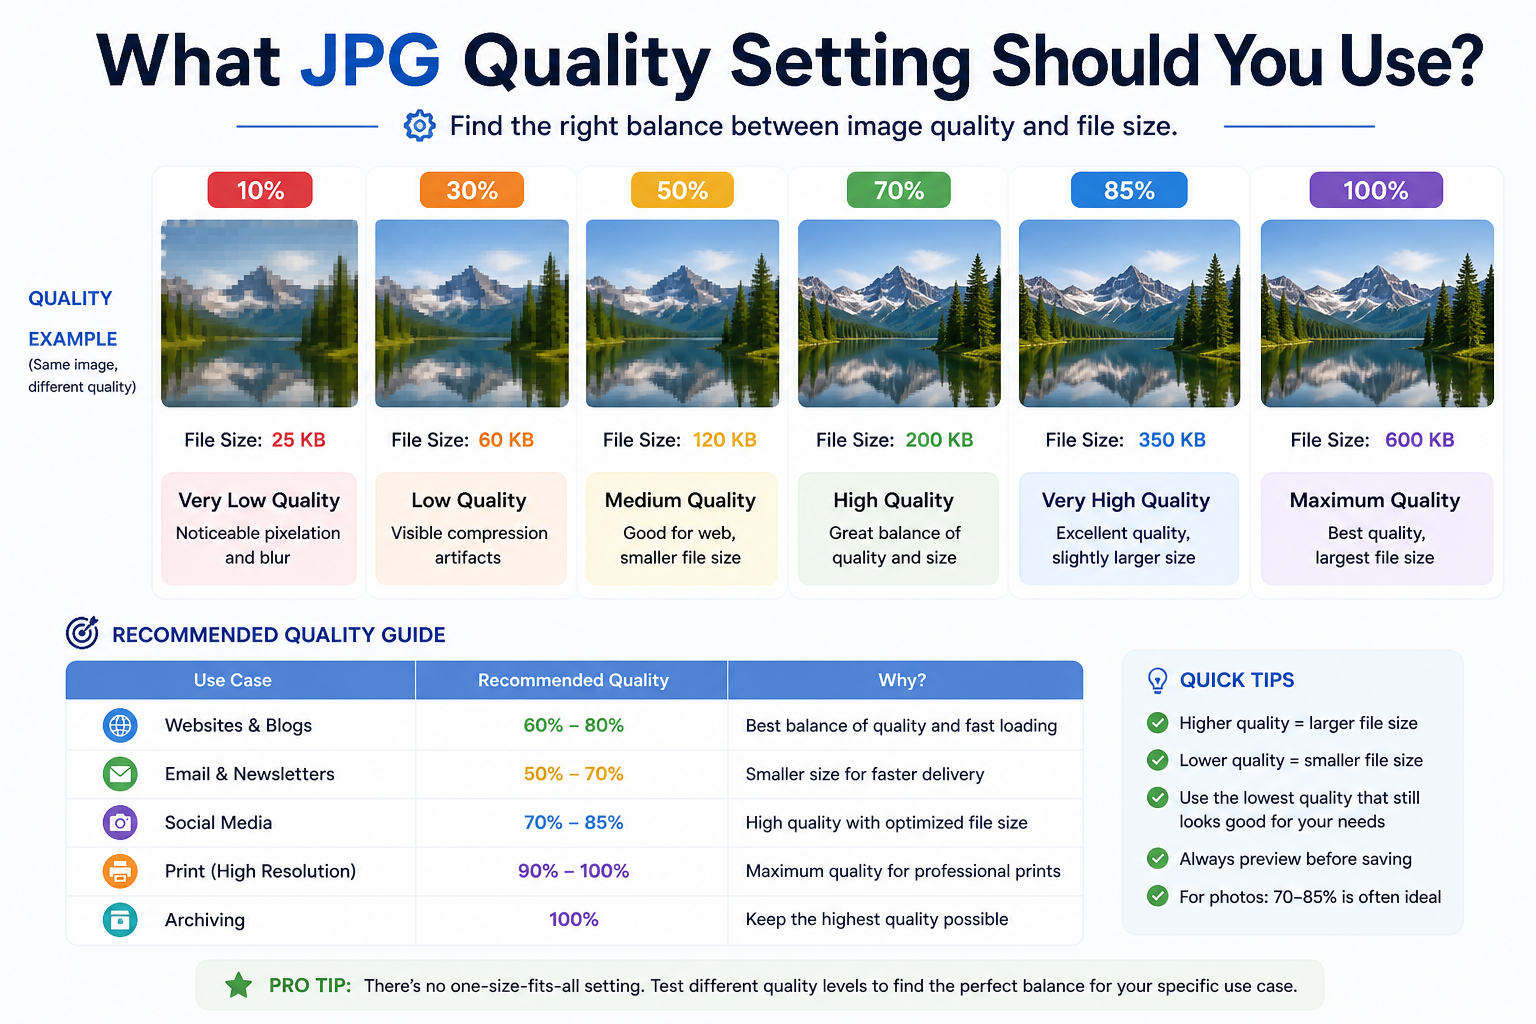
When you convert an image to JPG (or WebP, or AVIF), you’re asked to choose a quality setting — usually a number from 1 to 100. What does this actually mean, and what should you choose?
What Does JPG Quality Actually Mean?
The quality setting controls how aggressively the JPG compression algorithm discards image information. At 100% quality, almost no data is discarded and the file is large. At 1% quality, most data is discarded and the file is tiny — but the image looks terrible.
It’s not a linear scale. The difference between 95% and 100% is a huge file size increase for a tiny quality gain. The difference between 50% and 60% is visible but manageable. Below 40%, artefacts become obvious.
The Common Quality Tiers
95–100%: Archival / Professional
Use when: Printing, professional photography archives, source images you’ll edit later. File sizes are large — often 2–5MB for a typical photo. The visual quality is excellent, but the size penalty is steep. For screen viewing, you won’t see any difference from 90%.
85–92%: The Web Sweet Spot
Use when: Blog images, product photos, portfolio images, any image displayed on a screen. This range offers excellent visual quality — indistinguishable from the original to most viewers — at a fraction of the file size of higher settings.
Simple Image Converter defaults to 92% for good reason: it’s the right balance for the vast majority of use cases.
75–84%: Social Media and Previews
Use when: Social media posts, email thumbnails, image previews. Slight quality reduction is usually acceptable in these contexts, and the smaller files load faster on mobile connections.
60–74%: High-Compression Thumbnails
Use when: Very small thumbnails, image grids, situations where file size is the absolute priority. At this range, some artefacts may be visible on close inspection.
Below 60%: Generally Avoid
Below 60%, JPEG compression artefacts become clearly visible — blocky patterns, smeared edges, colour banding. Only use this range when you absolutely must minimise file size and display quality is not important.
Does the Same Quality Number Mean the Same Result Everywhere?
Not exactly. Quality settings aren’t standardised across different software. A ’90’ in one converter might produce a different file than a ’90’ in another. What matters is the actual visual quality of the output, not the number itself.
WebP and AVIF Quality Settings
The same principles apply to WebP and AVIF quality settings, but the compression is more efficient — meaning a WebP at quality 85% will typically look better than a JPG at quality 85%, while producing a smaller file.
How to Find the Right Setting for Your Use Case
Our recommendation: start at 90% and look at the result. If the file size is acceptable, you’re done. If you need it smaller, drop to 85%. If you can’t tell the difference at 85%, drop to 80%. Trust your eyes over the number.
👉 Adjust quality with our slider and see exactly what you’re getting — convert PNG/JPG to optimised formats free. Try it free at SimpleImageConverter.in